Monday, December 31, 2012

Celebrating the New Year!

Here is what I'm really looking forward to in 2013!
 
Become a national board certified teacher!
That's right, I'm going through the process right now. I'm hoping to pass it on my first try so I'm working really hard. Wish me luck!!
 
Become pregnant with our second child!
I want my little handsome to have a sibling to play with that is close to his age. Also a reason I want to be nationally certified...daycare is so expensive.
 
Potty train little man!
That's a goal for this summer after he turns 2 in May.
 
Create amazing science and social studies units!
I already have two uploaded on tpt and two in the works. I want great lessons that I can use again next year, and I want to stop putting these two subjects on the back burner. They are important!
 
Start a play group!
This one is mainly for the summer. I already have fabulous ideas and I want my little handsome to have lots of friends to play with.
 
Ok, I have lots more but I guess these are the biggest and most exciting ones.
 
So school starts back on Wednesday {boo!}. Here is how I'm planning on celebrating New Years with my students.
 
I plan on reading these two books throughout the day. One during our comprehension read-a-loud and the other during social studies:
 
This is a great story about practice and persistence to reach your goals.
 
 This is a great book that explains what a resolution is and how to make one.
 
Then we will fill out this graphic organizer as a class to get those creative juices flowing.


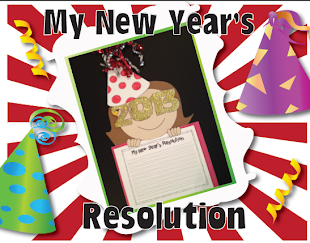
Next we will fill out our own graphic organizer to attach to our craftivity (below).


You can find this printable here.
 
 
Then we will make this adorable craftivity from the lesson plan diva. Find this resource here.
 
New Year's Resolutions
 
We are also going to count down the new year backwards from 60 using this! I'm hoping to time it at the last minute before the bell rings and have party horns from the dollar store for students to blow!
 
Happy New Year Everyone!!!

Monday, November 12, 2012

More Comprehension Ideas

Here are two more comprehension lesson that I came up with to go along with the Common Core Curriculum Maps ELA, Grade 1 Unit 2 (The Amazing Animal World).
 
Using this Common Core Standard:
 
RI.1.5 Explain major differences between books that tell stories and books that give information, drawing on a wide reading of a range of text types.
 
And these books:


First I began by reading Earthworms pointing out the headings, information, pictures, and captions on each page. I told the students to listen very carefully about earthworms because they would be writing about something they know or learned about earthworms today. After I read several pages of the book {definitely left out the mating page}, I told the students that they would be practicing writing nonfiction using headings, information, pictures and captions. I modeled first using the caption "Enemies of Worms" and I wrote about how moles like to find worms underground and eat as many as 30 a day. The students made me include the part where moles bite off a worms head and stores it in a burrow for later (yuck). I also wrote how birds like to eat worms too. On my picture I drew a picture of some worms in a moles burrow. On my caption I wrote "worms are stored in a moles burrow for him to eat later." Then I handed out this little sheet and asked the students to write about something that they know or learned about worms. They had to include a heading, information, picture and caption.
 
 
The next day I read Diary of a Worm and we compared the two stories together using a Venn Diagram. Make sure you use words like: tells a story, gives information, has headings, pictures, captions, fantasy, real, fiction, nonfiction...etc. If you are feeling ambitious you could give this sheet to partners first to see what they can do, then summarize together on a large Venn Diagram on chart paper.
 
 
Click the picture to download. {sorry, it keeps messing up a little at the bottom on google docs...send me a comment if you know how to fix or what I'm doing wrong.}
 
When I think of and teach more lessons to go along with the unit I'll share. Let me know what you think.


Saturday, November 10, 2012

Common Core Comprehension Ideas!

Are any of ya'll using this???
 
Its a common core curriculum map that takes all of the Common Core ELA standards and spreads them out into six, six-week units per grade level. I had a hard time using this book at first but my team and I are finally beginning to make sense of how to use it. Luckily for us our librarian ordered all of the read-a-louds that go with each unit. The only problem was there weren't any lessons that went along with it. Just suggested texts and a few ideas. So, what I'm currently working on is creating comprehension lessons that go along with the suggested read-a-louds and targeted ELA standards. Curently we are in unit 2: The Amazing Animal World. Here is what I've come up with so far:
 
I started with the fabulous Kevin Henkes, and this common core standard: RL.1.2: Retell stories, including key details, and demonstrate understanding of the central message or lesson.
 
 
First I read the story. Then we turned to a partner and told our partner details that we remembered from the story. Next we made an anchor chart of how to retell a story {sorry I forgot to take a pic but I will add it in later}. We practiced retelling the story to our partner. Then we went back to our desks to retell the story of Kitten's First Full Moon using beginning, middle, and end on moon circles that I had previously had cut out. We added a sweet little cat, some white stars and had ourselves a beautifully displayed retell of our story.


Click here to download the kittens.
 
Since informational texts are such an important component to common core this book was my next focus along with this standard:
RI.1.5 Identify the main topic and retell key details of a text.
 
To teach key details and main idea/topic I read the first few pages of the book above which was about  (what do you do with a nose like this?) As a class I wrote nose in the middle of my chart paper and jotted down the key details that the students remembered, enforcing how the key details help us retell a nonfiction story.
 
The next day I reviewed what we had learned yesterday and read the pages "what do you do with a tail like this?" Using sticky notes students had to write four key details from the story and write the topic in the middle. Feel free to use this template or if you want to save your copies, have them do it on regular notebook paper. Either way works great!
 The next day I read the rest of the book {what to do with ears, feet, and eyes like this}. I assigned each table a topic {ears, feet, or eyes} and together they had to discuss their topic and work as a table to write key details on a sticky note. Their discussion was important so that they didn't all write the same key detail on their sticky.
 
The next lesson I wrote worked on the same RI standard except instead of students finding the key details, this time I wanted them to focus on finding the main idea or topic of a nonfiction story. I used this amazing nonfiction book that had the students rivited.
 
After I read the story I had students turn and talk to an elbow buddy about all the key details that they remembered from the story. Then I called on several students to share what they remembered. After we had collected several key details I had students turn and talk to their buddy again about what they thought the main idea of the book was {of course I had the book hidden}. Last as a formative assessement I asked students to write the main idea of the story on a sticky and put it on my ticket out the door poster. Amazingly, everyone got it right in their own words!!!
 
Ok, my time is officially up aka little handsome woke up from his nap. I will be back soon with more comprehension lessons. I've got one more that I taught yesterday that I'm dying to share using a book about earthworms. Hope this was helpful!


Wednesday, October 10, 2012

Mineral Cookies

We are in the middle of an amazing science unit right now....Earth Materials! What? Earth materials can be fun??? I asked myself that too before I started teaching this unit but the more I brainstormed, the more fun hands on activities came!
Including this one.


They are called Mineral Cookies! Currently I am teaching the students about rocks. One question that we are thinking is, what are rocks made of? The answer...minerals! Since breaking apart a rock is kind of tricky...ok a lot tricky, we are breaking apart cookies filled with pretend minerals {chocolate chips, nuts, sprinkles, and coconut flakes}. Students will use a toothpick as their pick axe to dig into their cookie and find what its made of. They will fill out this little recording sheet as they work.
 
Click on the picture to download!
 
Then we will use magnifying glasses and pieces of granite to observe what real minerals look like inside of a rock to learn that rocks are made out of minerals! Last we will have a museum walk observing different types of minerals in their true form. This activity is just a small glimpse of an Earth Materials unit that I am getting ready to post on tpt.
 
If you have to teach Earth Materials then check back with me soon and I will help you plan 4 weeks of science lessons that will hit all of your essential standards for rocks, minerals, soil, and water{especially if you live in NC}. I'll also include the recipe for mineral cookies! Hope this was helpful!  Have a wonderful day!

Monday, October 1, 2012

Stained Glass Apples

I was looking at these in my windows today and they made me smile so I thought I would share how we made them.

First I copied the apple outline onto construction paper. I used a combination of red, yellow, and green.


Then I had the students cut out the middle {I made a little slit to help get them started}.

After they cut out the middle, then we cut out the outside and I put clear contact paper down on the black line side of the paper.{I had to leave the paper on the contact paper so you could see which side to put it on} 
Then students took small pieces of cut tissue paper and stuck it onto the sticky contact paper. Cut out a stem for their name and turn around for a beautiful stained glass apple!!

The apple outline isn't perfect but I am more than hapy to share! Just click on the picture below to download from google docs.


Monday, September 17, 2012

Social Studies Love

I am on a big science and social studies kick right now...big time. The first few weeks of school I have been focusing on social studies but science is not far behind. I'm so inspired by my friend Jenny who teaches a science lesson everyday to her class but I love social studies too much so I have to switch off from week to week. Just wanted to share two amazing lessons that I have recently taught that turned out amazing and that I feel my students really understood and "got it". For all of you NC readers this lesson goes with the Social Studies essential standard
 
1.E.1.2 Identify examples of goods and services in the home, school and community.
 
I began this lesson with a little vocabulary. First I wrote the word "goods" on a small white board and held it up for students to see. We read it together out loud and I had students turn and talk to an elbow buddy about what they thought the word meant. I let a few of them share what they thought it was and to explain their thinking but I never told them if they were right or wrong, I simply listened. Then I wrote the word "services" on my white board and had students turn and talk about what they thought this word meant and then share their thoughts agian never telling them if they were right or wrong.
 
After this little discussion I told students that I had small posters hanging up around the room with pictures on them. Their next job was to walk around the room with their sticky pads {they each have one in their pencil box} and put a sticky on each picture with either a "G" for goods or an "S" for services. Here are the pictures that I used {click on the picture to download from google docs}:
 
 
After students silently stickied each of the 6 posters we watched a brainpopjr video on goods and services. {If your school doesn't have an account you can sign up for a free trial or you can find a nonfiction book on goods and services that would work just as well.} Next I held up each poster and we checked our answers. If a student missed it I asked them how they know that this picture is either a good or a service. My formative assessment was a ticket out the door where students wrote an example of a good.
 
It rocked ya'll. I mean they reeeeaaaalllly got it. It was a great way to introduce vocabulary that was fun, interactive, and student led.
 
Next I will have students brainstorm in groups examples of goods and services in the home.....the school....and the community. I'm thinking of spreading this out and completing each place on a different day where students present their ideas in front of the class. For examples of goods and services in the school I'm thinking of giving each group a digital camera and having them take pictures for their examples. For goods and services in  the home they can find pictures in magazines and make a collage. For the community, I would love to have a farmer or someone in agriculture talk about the goods in our area and how his/her job is a service. Soo excited!
 
But before I could finish this series of lessons Constituition Day activities overshadowed today. I'm sure you have seen my posts about the unit I created. We played the game today and it was hysterical and perfect. They fell right in to my little plan. {Aren't first graders just so predictable?} It was the perfect hands on approach to get them to understand just what the country was like before the Constitution. Here is our anchor chart from today...too funny!
 

If you have my Constitution Day unit I would love to know how it went today!
 
Love to everyone!


Sunday, September 9, 2012

Constitution Day

Did you remember that Constitution Day is next Monday? Did you know that we have to teach it by law?

I have great news! You don't have to plan for it. I created a little Constitution Day Pack over the summer because it ALWAYS slips up on me and poor little Constitution, I just never teach him right, especially to those little 6 and 7 year olds. Here is a little preview:
 

I am starting off my lesson by playing an original {hands on} game "Capture the Flag" with special directions...none! The students play the game with no directions...I'm telling them that there aren't any directions, it's just all about fun. Then after the chaos sets in as well as the bickering and frusturation we will stop and talk about how they felt and then I will give them the real directions (which are included in the pack) as well as other ideas and directions that go with teaching this lesson. It will be amazing to watch the difference before and after the rules of the game.
 
Included in this pack:
 
original game with directions and printables
graphic organizers
directions and materials for writing a class Constitution
a fun student led group activity
two Constitution math/math tub activities
adorable Constitution Day craftivity
three writing prompts
formative assessment
 
It's everything that you need to teach the Constitution {the right way}. Don't let him {the Constitution} down. By teaching this pack your students will understand and be able to relate to the basic ideas of the Constitution. Why it was created? What it is for? When do we use it? How long ago was it written? What does it mean to me? Click {here} and get started planning!!
 

Update!!!

Here is a picture of part of my bulletin board that I created from the materials in this pack. Wish I could take a head on picture of the whole thing but our halls are too narrow so this was the best I could get!


Saturday, September 1, 2012

The First Week

I love Labor Day weekend. It's apple season in NC and the Apple Festival where I live is in full swing. Little man and I picked apples today at a beautiful orchard and plan on enjoying all the festivies of the festival tomorrow.
 
I just wanted to write a little post on some of my favorite activities from our first week of school.


Check out this adorable name flower one of my students made after we read Chrysanthemum. We counted the letters and vowels in our name to know how many petals and leaves to put on our flower. Cute right? I got the idea from Mrs. H over at Once Upon a First Grade Adventure. She has a Kevin Henkes back to school pack in her tpt store and it is amazing!
 
Here is another activity I did from her pack.
 
 
Its Wemberly Worried. The students wrote what Wemberly worried about and then things that they worry about. So stinkin cute!
 
In math we explored with manipulatives: pattern blocks, dominoes, connecting cubes, geoblocks and the computer while in small groups we practiced writing our numbers the correct way and we learned how to count objects accurately {by touching each object and moving it with our finger}. I just love this poem about how to write numbers!


In writing we wrote all of our letters, capital and lowercase, matched letters to letter sounds, and discussed the differences between sentences and nonsentences. This activity turned out awesome and the students LOVED it.
 
First we sorted premade sentences that I had written on sentence strips. We talked about what sentences need and then we practiced writing a sentence on a sticky note. {Keeping sticky notes in our pencil boxes work great for quick formative assessments like this}. We shared our sentences and then just for fun we practiced writing a nonsentence. They all giggled at the silly nonsentences!
 
Looking forward to another great week and sharing more fun ideas!
 
 
Love to all!

Thursday, August 30, 2012

Back to School Classroom Pictures

Still surviving my first week of school. Whoever thought that beginning the first day of school on a Monday was a good idea, surely has never taught elementary! Whew!!! And these babies are EXHAUSTED! I swear by 10:00 most of them are D.O.N.E.!! But thats because we are big first graders and we are working so hard. I have lots to share about our first week coming soon. But first I want to share some pictures that I have been too busy to post!
 
First is my back to school bulletin board.
 
I wish I could have gotten a straight shot of it but our halls are too narrow! Here it is from the other angle.
 
My classroom is not sports themed, I just thought that this was a cute idea. I think my husband inspired me, he's been counting down football season ever since the summer. Me? I could care less! :)
 
I made the cute little football players and cheerleaders by purchasing a few sets from Scrappin Doodles. Then I projected the images and traced them out. You probably can't see it from the pictures but the little footballs have the students names on them. We are working on a writing piece about how we can be a team player this year to go up with their footballs. I love it. Back to school bulletin boards are probably my most favorite part of coming back to school. I love to walk the halls and see what everyone else comes up with and I gotta tell ya, my school has some pretty cute stuff!
 
Next are pictures of my classroom. Keep in mind that it is pretty bare bones. Lots of student work and decorations will be coming soon. But stalking seeing other classrooms is one of my favorite things to look at in blog land.


I love my writing area. On the back of the shelves, facing the cubbies are the students book boxes. I have my letterland cards on the writing table. Usually these are on the floor or sitting on the board but it was meet the teacher night so I was trying to get it out of the way.
 
Look at all of this storage!!! The two tables in the back are my assistant and my small group tables. We have small groups during daily five, math, and phonics.  
 
 
This is our reading area.The picture turned out kind of dark. I'm working on some better/bigger pillows.
 
It's a work in progress but it's my second home!
 
I'll have more on my first week of school soon!


Monday, August 20, 2012

Must Have Monday {Teacher Week}

Must have Monday Countdown:

#1 A strong phonics program!


Our school adopted Letterland last year and my teammates and I couldn't be any more thrilled. Its geared for K-2 phonics instruction and teaches the students phonics and spelling patterns through stories that they actually understand, remember, and love. Ya'll this program has a story and an explanation for every spelling pattern and sight word. It amazes me the creativity that was involved with making this program. And the best part is, I LOVE to teach it. If you aren't satisfied with your phonics program I highly recommend looking into Letterland.

#2 A good pencil sharpener!

Ya'll, I can't even count the number of pencil sharpeners that I have gone through in just 6 years. Finally last year with a little help from our Fall Festival earnings, I invested in this beauty. Pencil sharpening has never felt so good and obviously by this picture I have quite a few pencils to sharpen before school starts.

#3 A lesson plan book {with lines!}


Does this old school blue lesson plan book look familiar to any of you? We used to get these free at the beginning of each year and then all of a sudden they stopped giving us lesson plan books. So last year I ordered one without looking carefully enough and it didn't have lines {gasp}! It was a tough year with no lines. But over the summer I ordered old faithful and  decorated her with some stickers. I love all of the awesome computer template lesson plans that I've been seeing but for some reason, I like to have it hand written. This lesson plan book will follow me everywhere...meetings, weekends, car trips, you name it just in case an idea hits me or I want to change something around. Let me know if any of you still like to do it old school style with me! ;)

#4 Diet Coke!

Yep, I'm an addict and I know it! I limit myself to one a day. I don't even drink it for the caffine, just for the fizz and the flava!

Check out what other teachers say is their must haves! Click on the picture to take you there!

Have a great day!

Meghan


Monday, August 13, 2012

How We Get Home Labels! {Freebie}

Who doesn't get confused and sometimes frusturated with the constant changes of how your student(s) get home each day. For me the most terrifying part of a changing schedule is sending the student home the wrong way. Scary! So I got some inspiration from pintrest {of course} and made these little tags. Click on the picture to download yours for free!

I have mounted them to my wall with ribbon and will have a clip for each student. After I check agendas each day or when my secretary calls me throughout the day with a change, I can go over to this display and move that child's clip in the appropriate place. Then when it is time to line up and go home, I have everyone organized where they need to be. Here is the general idea {without student names yet}.


This idea came from  tattling to the teacher and you can see her blog post and labels here!

Visit Tara at 4th Grade Frolics to see what other ideas teachers have made this week!


Don't forget, today is the last day for the teachers pay teachers back to school sale. Be sure to check out my Constitution Day Packet!


Let me know what you think!
Love to all!!


1.